Butterfinger Balls – Full Detailed Recipe
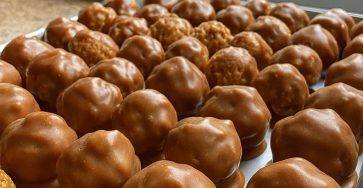
Butterfinger Balls are a no-bake, crowd-pleasing treat made with creamy peanut butter, crunchy crushed Butterfinger candy bars, and a smooth chocolate coating. They’re incredibly easy, freeze beautifully, and require only a handful of ingredients. Perfect for holidays, parties, cookie trays, or anytime you want a sweet bite-sized dessert!
This long, step-by-step recipe includes expert tips, variations, and storage advice to guarantee perfect results every time.
Ingredients
Base Mixture
- 1 cup creamy peanut butter
- ½ cup unsalted butter, softened
- 1 tsp vanilla extract
- 2–2½ cups powdered sugar (depending on thickness)
Add-Ins
- 2 cups crushed Butterfinger candy bars (about 8–10 fun-size bars or 3–4 full-size bars)
Chocolate Coating
- 2 cups milk chocolate chips (or semi-sweet)
- 1–2 tbsp coconut oil or shortening (for smooth melting)
Optional Toppings
- Extra crushed Butterfingers
- Drizzled white chocolate
- Sea salt flakes
Instructions (Long & Detailed)
1. Prepare the Base
- In a large mixing bowl, beat together softened butter and creamy peanut butter until smooth and fluffy.
- Add vanilla extract and mix again.
- Gradually add powdered sugar, ½ cup at a time.
- The dough should be soft but firm enough to roll.
- Add more powdered sugar if the mixture feels sticky.
2. Add the Butterfinger Crunch
- Crush the Butterfinger bars:
- Place them in a zip-top bag and crush with a rolling pin,
OR pulse lightly in a food processor.
- Place them in a zip-top bag and crush with a rolling pin,
- Fold the crushed Butterfingers into the peanut butter mixture until evenly distributed.
Your dough should now be thick, scoopable, and textured.
3. Roll into Balls
- Line a baking sheet with parchment paper.
- Scoop 1-inch portions and roll them into smooth balls using your hands.
- Place them on the tray, evenly spaced.
- Chill the balls in the refrigerator or freezer for 20–30 minutes to firm up.
Chilling prevents them from falling apart when dipped in melted chocolate.
4. Prepare the Chocolate Coating
- In a microwave-safe bowl, melt the chocolate chips with coconut oil in 20–30 second increments, stirring between each cycle.
- Stir until glossy and smooth.
You can also melt the chocolate using a double boiler.
5. Dip and Coat
- Remove the chilled Butterfinger balls.
- Using a fork or dipping tool, dip each ball into the melted chocolate and let excess drip off.
- Place each coated ball back onto the parchment-lined tray.
- Optional: Sprinkle crushed Butterfingers on top before the chocolate sets.
6. Chill & Serve
- Refrigerate the dipped balls for 10–15 minutes, or until the chocolate shell is fully hardened.
- Serve chilled or at room temperature.
Tips for Perfect Butterfinger Balls
- Use softened butter, not melted — it creates the perfect texture.
- Natural peanut butter (runny) doesn’t work as well; stick to regular creamy PB.
- Chill before dipping to prevent crumbling or melting in warm chocolate.
- Add more powdered sugar if you want firmer, truffle-like balls.
- Drizzle leftover chocolate on top for a bakery-style finish.
Variations
White Chocolate Butterfinger Balls
Dip in melted white chocolate for a sweet, creamy twist.
Crunchy Peanut Butter Version
Use half creamy + half crunchy peanut butter.
Peanut Butter–Chocolate Swirl Balls
Dip halfway in chocolate and leave half undipped.
Butterfinger Cheesecake Balls
Add 4 oz cream cheese to the dough for a creamier texture.
No-Chocolate-Coating Style
Roll the balls in crushed Butterfinger instead of dipping.
Storage
Refrigerator:
Up to 2 weeks in an airtight container.
Freezer:
Up to 3 months.
Freeze on a tray first, then store in bags.
Serve:
Best enjoyed slightly chilled so the chocolate stays firm.